Convert multiple DVDs to AVCHD / Bluray using multiAVCHD
At the request of a visitor to this site (in addition to it being on my TODO list for guides to write) I present to you the steps necessary to convert a DVD (or several) to AVCHD or Bluray. All that is necessary are some ripped DVDs and the always wonderful program multiAVCHD!
So, let's get started.
Rip yo discs!§
Make sure that you have your disks ripped in File mode. This is necessary for multiAVCHD to read them correctly. You can rip your disks using either DVD Decrypter, AnyDVD or DVD FAB. All of these should output the disk in the format desired.
Add your Sources to the Compilation§
You will need to add your DVD sources to the new disk compilation. I suggest doing this one at a time. You will see why later.
Use the AVCHD/BDMV/DVD foldersbutton to navigate to your DVD directories one by one. After loading your first disk, move on to the next step.

Remove Unnecessary Titles§
Using the Remove button and the title info, remove all titles that are not the main movie. The main movie 99.9999999% of the time will be the title set with the longest run time.
In this case, you can see that my third title is the main movie. So, if I remove titles 1, 2, and 4, then that will leave the main movie.
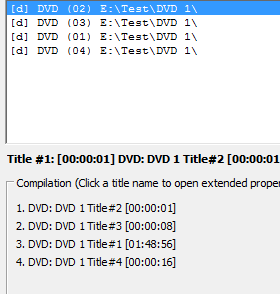
And here is the result of keeping only the main movie.
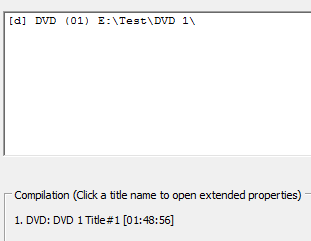
Repeat this and the previous step for all of your remaining disks.
Title Compilation§
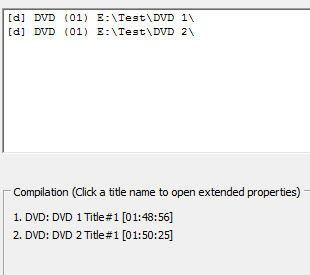
Here are the final title sets that we get after adding the remaining DVDs and removing the excess titles from our compilation.
In this state, the DVD titles are not ready to be encoded onto a Bluray. MultiAVCHD is actually smart enough to convert the titles automatically when we select our output format. I, however, like greater control over my transcode settings plus the ability to add/remove audio and subtitle tracks. To do this, click on the first title and we will be presented with the title settings window.
Editing your Title Settings§
The title settings window generally looks like the one below.
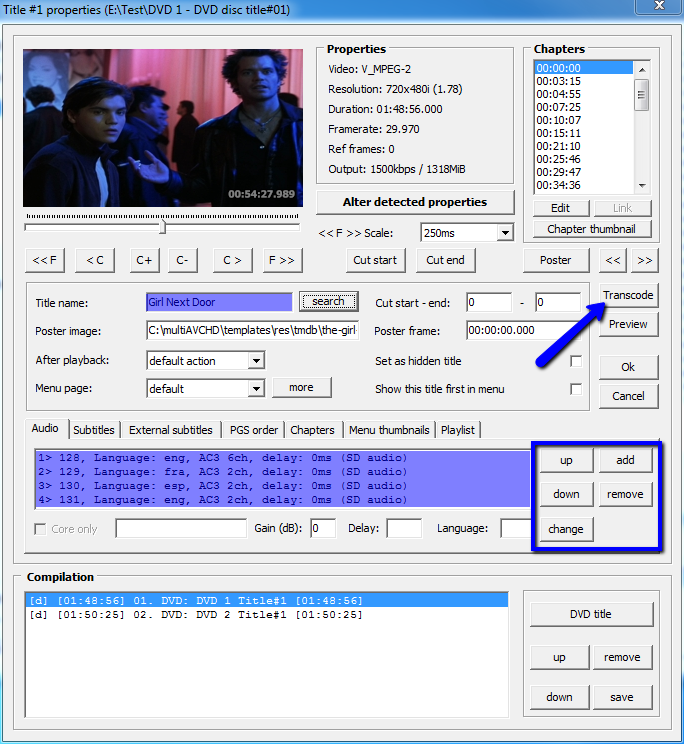
As you can see, I've edited my Title nameto the name of the actual movie.
In addition, you can add and remove audio and/or subtitles using the corresponding tabs and Add/Removebuttons. In my case I left them at default, but you can do what you will (like removing the foreign audio tracks to save space).
When you are happy with your title settings, press the Transcode button to bring up the encoding settings window.
**Note:**Just a reminder that the Transcodeprocess is optional. Blu-rays support MPEG2 by default, so actually converting your sources to H264 is not necessary unless you are storing a significant number of DVD's on one Blu-ray. If you want to skip the transcode process, just jump down to the Menu and Output Format section.
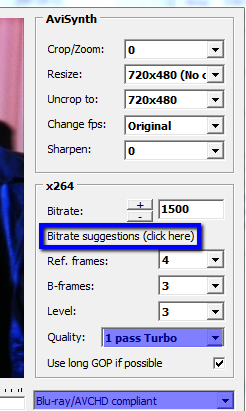
Encoding Settings§
In the transcode settings, set your desired quality profile and bitrate settings. Since we will be generating files for an AVCHD / Bluray, we want to make sure that our settings are Blu-ray/AVCHD compliant.
Next, select your encoding profile. I recommend using a 2-pass profile for a high quality encode. In this case I used a fast 1 pass profile, but I was just testing.
As for the resolution, I recommend that you leave that at default. You can upscale if you like, but honestly you actually lose quality bringing a low-resolution video like a DVD up to a high resolution video like a Blu-ray.
Lastly we need to choose a bitrate. I suggest that you click the Bitrate Suggestions button (yes, that is a button).
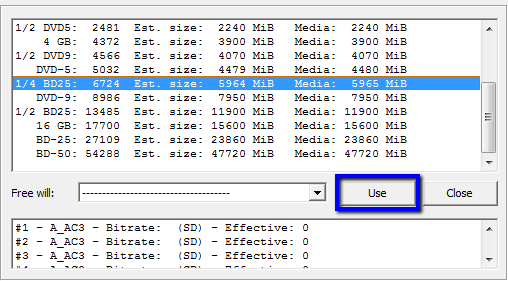
Bitrate Profile Selection§
After clicking the Bitrate suggestions button, you will be presented with a window like the one below. Now, imagine I was converting 4 DVD's that I wanted to store on a single layer Blu-ray (BD-25). In that case, I would select my bitrate profile for my first movie to be 1/4 of a BD-25. Get it?
Now select your bitrate profile based on your desired output disk. I leave that up to you.
When you've chosen your settings, click the Use button. You will return to the Transcode settings window. Make sure everything is as you desire, and then click Apply.
Repeat Ad Nauseam§
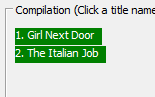
After finishing the transcode settings for the first DVD, go about editing the compilation and transcode settings for the rest of the DVD titles. When all is said and done, your DVD titles in the compilation window should look similar to the one below.
Green means go!
Menu and Output Format§
Now that our titles are compliant, set the menu settings and output format. Click on over to the Author tab to edit your settings. Mine are below for reference.
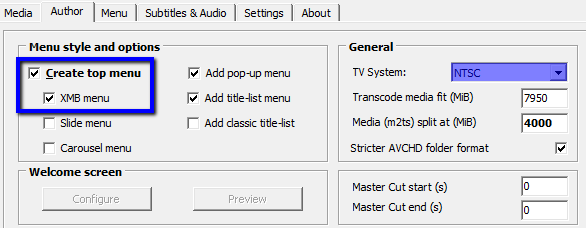
In short, I wanted a basic top level menu (XMB style) and my output TV system will be NTSC. For those of you who don't know, NTSC is the standard in the United States. PAL is the standard in Europe.
Almost Done!§
When you are ready to get started (or get finished?) set the output suffix (this sets a suffix on the output folder generated by multiAVCHD.) The helps you to identify your project in the output folder if you are doing multiple conversions.
Then click the Start button.

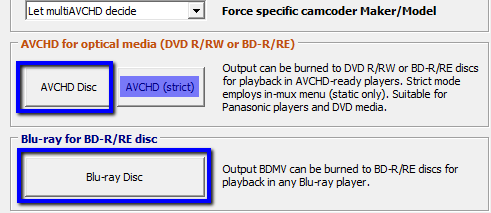
Output Format§
Final window, I promise! Now we need to select our output disk format. multiAVCHD offers a plethora, but I've narrowed my screenshot down the import ones. If you want an AVCHD disk, go with the AVCHD options. Use AVCHD (strict) if you are Blu-ray player is especially finicky, otherwise use AVCHD Disk.
Now, since I wanted a Blu-ray for my output, I'm sticking with the Blu-ray Diskoption. Kind of a no brainer I know.
Finished!§
Now, burn your disk! I'd recommend using IMGBurn, as it's free and highly reliable.